Friday, June 24, 2016

Failed to inject OSD binaries into mounted WIM file ErrorCode = 2152205056

The update distribution point wizard will fail  when we update the distribution point after adding option components to a boot image in SCCM console.
The error we see is The Update Distribution Points Wizard completed with errors;
and
Error: The wizard detected the following problems when updating the boot image.
The SMS Provider reported an error.: ConfigMgr Error Object:
instance of SMS_ExtendedStatus
{
Description = "Failed to inject OSD binaries into mounted WIM file (often happens if unsigned drivers are inserted into x64 boot image)";
ErrorCode = 2152205056;
File = "e:\\qfe\\nts\\sms\\siteserver\\sdk_provider\\smsprov\\sspbootimagepackage.cpp";
Line = 4970;
ObjectInfo = "CSspBootImagePackage::PreRefreshPkgSrcHook";
Operation = "ExecMethod";
ParameterInfo = "SMS_BootImagePackage.PackageID=\"SCB00005\"";
ProviderName = "WinMgmt";
StatusCode = 2147749889;
};

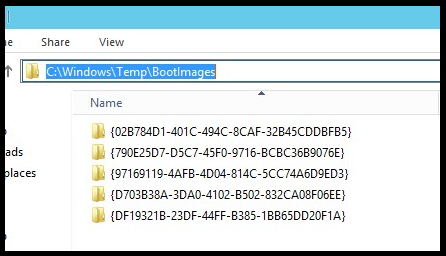
If we open BootImages Folder under C:\Windows\Temp\ we see few subfolder;
   

If we tried to delete these folders manually, we will get access denied error. So instead of using windows explorer, we need to use DISM to delete them. 
First we will un-mount the mounted WIM’s, then delete any leftover folders.

Now, launch command prompt as administrator then run dism /get-MountedWiminfo to check whether any mounted WIM’s exist on the machine;

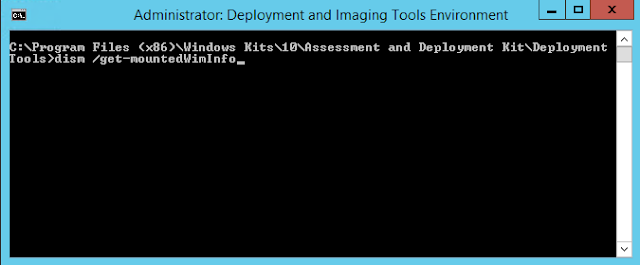
If we have mounted WIM’s then the command window will look like as below;
 

We have five boot images mounted. Before we try to update the boot image, we need to clean these images by um-mounting them.
So we need to un-mount each boot image one after other by running dism /unmount-Wim  /MountDir:C:\Windows\Temp\BootImages\{xxxx-xxxx-xxxx-xxx-xxx-xxxx}\mount /commit
Note: you need to get the {xxxx-xxxx-xxxx-xxx-xxx-xxxx} value from the BootImages folder under C:\Windows\Temp\
Now we can see the progress of un-mount process. Repeat the step for all the mounted boot images.

While un-mounting you may get error dism unmount error 32, restart the server then try again.
Once all the WIMS are un-mounted, the C:\Windows\Temp\BootImages should be empty. if any folders left out you should be able to delete them. 

Run dism /get-MountedWiminfo to get the mounted WIM info. If we have un-mounted all the WIM’s then we should see ‘No mounted images found’.


Now, run the Update Distribution Points Wizard and it should complete successfully

Saturday, June 18, 2016

SCCM 1602 update rollup KB3155482 installation step by step guide

When we have a new servicing update is available in SCCM console, we will be prompted A new update is available for Configuration Manager. You can view and enable available updates in the Administration workspace from the Cloud Services -> Updates and Servicing node.

To view the available update, go to \Administration\Overview\Cloud Services\Updates and Servicing

This time we have Configuration Manager 1602 Hotfix (KB3155482). This hotfix will show up in the console only after installing Configuration Manager 1602 update.

About hotfix KB3155482:
Update type: Update rollup
Applicable Product: System Center Configuration Manager 1602
Released on: 3rd June 2016
Fixes: 
-     Remote Control fix on Windows Embedded
-          Incorrect built-in client policy update interval fix
-          SMS Executive service and Exchange Connector component issue fix
-          DBSchemaChangeHistory increases database size excessively fix
-          Microsoft Intune and MDM related fixes

After applying KB3155482 rollup update, the SCCM client version will be changed from 5.0.8355.1000 to 5.0.8355.1306.

Pre-Update tasks:
-          No pending system reboots are present
-          Hierarchy is healthy

Let’s Check the version numbers before applying the hotfix;
System Center Configuration Manager Version 1602
Console Version: 5.0.8355.1000
Site Version: 5.00.8355.1000

 The Primary site will show;
 Version: 5.00.8355.1000
 Build number: 8355

Applying hotfix KB3155482:
Initially the update status will show Downloading in SCCM console under \Administration\Overview\Cloud Services\Updates and Servicing node;

Once the download is completed, then the status will change to Available;

When the status changes to Available, right click on Configuration Manager 1602 Hotfix (KB3155482) under \Administration\Overview\Cloud Services\Updates and Servicing then click on Run Prerequisites check;

Once the prerequisites check passed successfully, Right click on Configuration Manager 1602 Hotfix (KB3155482) under \Administration\Overview\Cloud Services\Updates and Servicing then click on Install Update Pack;

Click next on the General window;

Select desired Client update options.
If we want to test the client package before updating the actual production package, then choose Validate in pre-production collection otherwise select Upgrade without validating.
Remember, if we choose Upgrade without validating, this will overwrite the existing client package.

Accept the License Terms then click next;

Review the summary of the update then click next;

Close the wizard when it completed successfully.

Once the configuration manager updates wizard is closed, if we check the status of the Configuration Manager 1602 Hotfix (KB3155482) under \Administration\Overview\Cloud Services\Updates and Servicing it will change from available to Checking prerequisites

At this stage, if we open the task manager, we can see cmupdate processor running;

After sometime the update status will change to Installed.

Once the update status changed to installed, go to top left corner of SCCM console and click the white down triangle then click on About Configuration Manager;

We will be prompted with “An update to the existing console is available (5.00.8355.1306). Click OK to close the console and install the console update now. Click Cancel to continue working with the existing console (5.0.8355.1000)”
Click OK to install the console update;

The console will be automatically closed if we click OK, then we will be prompted with UAC.
Click yes on UAC;

The Update package will start downloading the console update package;

The installer will start updating the console automatically;

We will receive a Console Setup Wizard completed message box.
Click finish on the Console Setup confirmation window.

Re-open the console and now the console version will show;
          System Center Configuration Manager Version 1602
          Console Version: 5.0.8355.1306
          Site Version: 5.00.8355.1000

Once the SCCM client is pushed and upgraded on the client devices, the version change will be showed in SCCM console as 5.00.8355.1306;

Post-Installation activities:
After successful completion of applying update rollup KB3155482 make sure that;
      - All the client devices client need to be upgraded to 5.0.8355.1306
Note: 1602 client should be deployed to the clients before applying the client package with  KB3155482
      - Manually upgrade the Configuration Manager consoles installed other than the site servers

Click here for complete SCCM 1511 Current Branch setup step by step guide.

Click here for complete SCCM 1511 Current Branch step by step guide, step by step migration guide, step by step monitoring and health check guide and step by step SCCM Current Branch servicing guide.